

Lab stands and clamps: support a setup without forcing the glass

Understand the base, upright and clamp.
- Check the load path, reach and connections before using a supported assembly in a science practical.
A stand supports an assembly through its base, upright and attachments. A clamp grips a chosen part of that assembly. Before tightening a screw, understand which parts carry the load: a firm grip does not prove that the stand is stable or the glass is supported correctly.
The trainer must choose the stand, clamp, gripping position and any additional support for the actual apparatus. The load limit and how tightly to grip the apparatus depend on the stand, clamp and setup.
Follow the support from the bench to the apparatus
The base rests on the bench and helps keep the stand upright. The upright carries attachments at their assigned heights. The clamp connects the supported part to that structure. DWK's two-prong clamp description illustrates how jaw shape, covering and reach are features of a particular clamp, not properties to assume for every model.
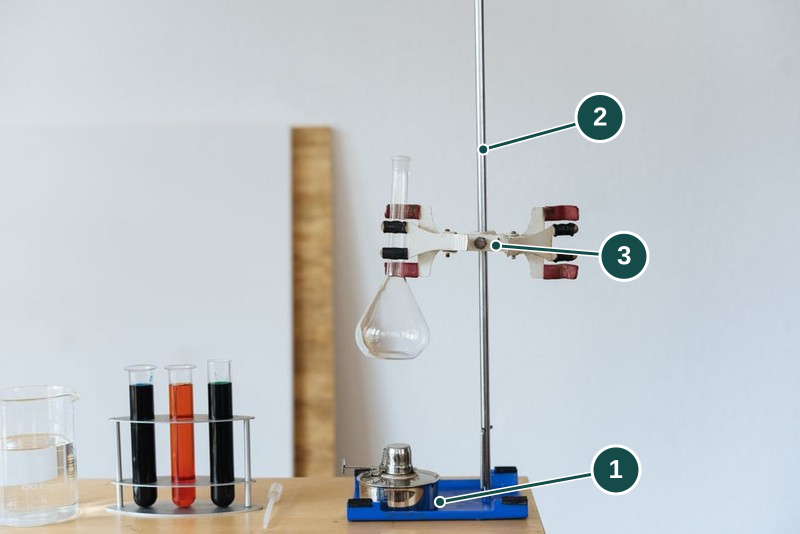
- Stand base. Rests on the bench. Check that the stand stays stable with the full load attached.
- Upright. Supports the attachment at the height set for the experiment.
- Clamp. Grips the part at the position and tightness shown by the trainer.
Stock photograph for illustration by RF._.studio _ on